

Top 11 RV Storage Near Me Seattle
- October 9, 2023
- RV Storage, Seattle, Uncategorized
Seattle, Washington, known for its stunning landscapes and outdoor adventures, attracts RV enthusiasts from all over. But when it comes to storing…
Read More
As the winter months arrive and you’re putting your RV away for the winter, you’ll need to take the proper preventative maintenance measures. You will need to completely clean and winterize your RV so it’s ready to use come spring season. This is a quick guide on how to best winterize your RV to minimize damage and repairs during the harsh winter months. Make sure you follow the critical steps outlined in this guide!
The first step you should take when planning your winterizing is to pull out the RV manual and verify the steps to properly winterize. Your manual is the first thing you should check when dealing with any vehicle as the manufacturer knows what’s best in properly maintaining your asset. Manufacturers usually provide a basic checklist and instructions on how to find things in the manual and you should use that in coordination with this guide.
Winterizing your RV, camper, or travel trailer is an important part of your responsibility as an owner. If you want to prevent future repairs that will cost you a fortune over time, spending the time to winterize will help reduce time, energy, and money getting ready for the next season. Winterizing does a number of preventative maintenance measures that will help while your RV is stored for the winter. It will help prevent erosion, infestations, protect the paint and the inner plumbing of your RV. Just like you have to maintain and change the oil in your vehicle, you have to do the same basic checks for your RV.
This is an essential task after using your RV all summer. Keeping your vehicle clean shows, you care and respect your summer getaway asset, while it will also keep it from smelling and attracting unwanted critters. Food and trash attract bugs, ants, rodents, and even bears. The last thing you want is to come back after a few months away and have to deal with an infestation because you didn’t clean your RV.
In order to clean the interior, we recommend using Clorox Wipes or Aero Cosmetics Waterless Wash Kit which is a disinfecting agent that will kill off bacteria from growing into an even bigger problem. These wipes and cleaning kits are great for easy cleaning!
In order to best protect your RV’s exterior, you need to wash, inspect, and apply preventative measures to protect that shiny exterior. You can apply non-abrasive cleaner on the sides of your RV and a dedicated roof cleaner for the roof.
Inspect:
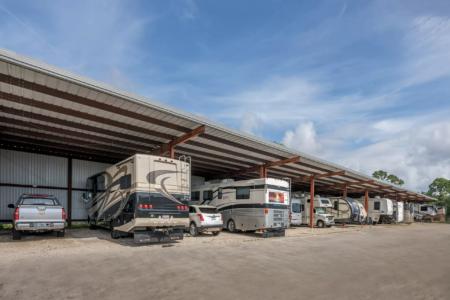
Finding a safe, secure storage space is one of the most important tasks for winterizing your RV. You need a low-cost, highly secure, and convenient storage space that you will feel safe storing your RV for the winter months. You may also want to check your RV occasionally during these harsh winter months so it’s best to find space conveniently located to your home. You can find low-cost, secure, and convenient storage spaces for you RV and trailer on PeerStorage’s marketplace.
There should be two key water tanks that you should be concerned about: one which contains gray water, which contains all the runoff from using the sink and showering, and one for black water, which contains human waste and cannot be safely reused for any other purpose.
The first step will be to completely drain these two tanks in the proper drainage area. These tanks contain bacteria that can be harmful to humans so you will then need to clean them out with specialized black water tank cleaner. This product could be from Septic Shock or any other like products recommended by the manufacturer.
Once you’ve cleaned out the water tanks and wastewater, you will then need to clean out your water lines and hot water heater. If you forget and leave water in the lines, they could freeze, expand, and burst which will leave you with an expensive repair and mess when you get ready for spring camping. Leaving water in the lines can destroy your RV so it’s important to completely drain them.
When you drain the hot water heater, you should make sure to do it when it’s not hot or under pressure. Make sure you follow these step’s below to safely drain your water system:
This is a no-brainer, but can easily be forgotten. If you’re like me, you tend to eat all the food in your fridge regardless of what season it is, but just in case you didn’t finish the food from your last trip, clean out your fridge!
Failing to clean out your fridge can not only trap old food that will mold, but it will also attract rodents, insects, and unwanted animals. Remove all the items in the fridge and freezer, clean out the ice maker, and make sure it’s turned off. Unplug the unit and defrost the freezer to clean it out. You need to thoroughly clean your fridge and freezer if you want to come back to a decent smelling RV come spring.
To keep the battery in working order during the winter, it needs to be removed from the RV and stored in a warm place. If it is left in, it has the possibility of freezing and not working when you need it. Here are some steps to take when winterizing your battery:

Tiny gaps can lead to huge problems over the harsh winter months, when insects may creep in. Seal all the small holes and gaps throughout your RV to protect your summer getaway home.
Are there any gaps from your windows and doors that can invite insects or bugs in? If you can feel outside air from the inside and see daylight, you will need to fill this gap. Place sealant that will prevent water from leaking inside over the harsh winter weather conditions.
For older, or more frequently used RVs, you may want to consider taking a look up at the condition of the roof. Do you see any visible cracks that have formed? These small cracks will lead to bigger cracks over the winter and into the summer. These need to be closed immediately! Heavy rainfall and snowfall with freeze cycles will turn the small gaps into huge problems come spring.
You can install a full-covered sealant to seal up as many cracks as possible and extend the life of your roof. You can also choose to use the lap sealant you used for the windows and doors on the roof as well.
There should be a cover for the outside outlets on your RV. If they don’t have a cover then check the manufacture’s owner manual to order spare parts. It’s very important to cover your outside power outlets so no pests get through and your RV wiring system doesn’t get damaged from heavy rainfall.
This is another easy but sometimes forgotten task. If you haven’t drained the water tanks and pipes from your RV already then see step 3 above, I would do that before you start cleaning the toilet. You want to make sure you get everything out so you can just wipe down the toilet, seat, and surrounding areas. If you’d like, you can also spray some Febreze or disinfecting spray to make sure all the unwanted smells are gone.
Your awning is frequently used during the summer months which captures dirt and leaves over the year. Look for a special awning cleaner, rather than using dish detergent or other commercial cleaners. If you haven’t already, check the manufacturer’s maintenance book to see what type of cleaner they recommend for the awning.
In order to clean the awning, roll it out all the way. Inspect for any cracks or tears in the fabric. Doing this inspection will help you determine if it needs to be replaced for next summer which you can get done in the winter months. Nothing like having a brand-new awning come camping season!

Leaky propane lines can be hazardous to your RV and the surrounding RVs, campers, and trailers. In order to keep everyone safe, disconnect the propane tank so it won’t be leaking while in storage. Completely shut it off and disconnecting from any lines during the winter months will ensure the safety of your RV and others.
After you have drained and cleaned the water pipes and tanks, run RV antifreeze through the whole system. Bypass your water heater to save yourself an extra 10 gallons of antifreeze. Antifreeze is important to prevent damage from cold temperatures in your water system which can be very expensive to replace.
RecPro RV Antifreeze -50°F Protection Non-Toxic (4 Pack)
If you’re lucky enough to find the perfect, local storage space for your RV, it wouldn’t hurt to check on it once in a while. Even if you’ve completed everything on this list, there’s a chance something could go drastically wrong during harsh weather. All you would need to do is inspect the outside of the RV, look at the cover for any drips or leaks, and the level of the RV. Tire leaks or failed jacks can lead to the RV tipping or leaning to a certain side. Plan to check up on your RV at least once per month.

If you follow these steps then your RV will be ready for the harsh winter months. The more you prepare for winter, the more your prepare come springtime! Your RV is a huge asset that you would like to keep nice all year round so you can spend quality time exploring with your family.
Have a recommendation that we missed? Comment below your own tips and tricks for keeping your RV safe during the winter.


Seattle, Washington, known for its stunning landscapes and outdoor adventures, attracts RV enthusiasts from all over. But when it comes to storing…
Read More
Speaking about Seattle, this is a well-known seaport city that is located on the United States West coast. With a population of…
Read More
With a variety of self-storage facilities in Seattle, it’s not easy to find reliable 24-hour storage services that fit your… Read More
You must be logged in to post a comment.
[…] How to Winterize Your RV – The Ultimate Guide […]
[…] How to Winterize Your RV – The Ultimate Guide […]
[…] How to Winterize Your RV – The Ultimate Guide […]
[…] How to Winterize Your RV – The Ultimate Guide […]
[…] How to Winterize Your RV – The Ultimate Guide […]